Puff Stitch Pumpkins Pattern Release!


Mini Pumpkin
- ~70 yds of any weight 4 yarn
- 4.0 mm crochet hook (G hook)
- Tapestry Needle
- Stick to insert as a stem
- Glue for the stick
- Polyfil
- Extra decorations (optional)
Stitches and Abbreviations
MR- Magic Ring
ss- Slip Stitch
Puff- Puff Stitch - (yarn over, insert hook and pull up a loop) x 5. When you have 11 loops on your hook, yarn over and pull through all loops, ch 1 to secure.
Puff inc- Puff Stitch Increase - Place two Puff stitches in the same space.
Puff dec- Puff Stitch Decrease - (yarn over, insert hook and pull up a loop) x 5. When you have 11 loops on your hook, (yarn over, insert hook and pull up a loop) x 5 into the next space. When you have 21 loops on your hook, yarn over and pull through all loops, ch 1 to secure.
FO- Fasten Off
Notes:
- Do not turn when completing a row, this will create irregular puff stitches.
- When finishing each row, do not ch 1 (securing ch of Puff) prior to ss to the beginning of the row, doing so creates too big of a hole when stuffing the pumpkin.
- Each Puff Stitch is made in between the stitches from the previous rows.
Pattern for the Mini:
Row 1: Work 6 Puff in a MR (You need to ch 2 after the MR to get the right stitch height) ss to beginning ch, ch 2 (6 Puff)
Every stitch after this will be placed in between stitches.
Row 2: Ch 2, (Puff inc) x 6, ss to beginning ch (12 Puff)
Row 3: Ch 2, (Puff 1, Puff inc) x 6, ss to beginning ch (18 Puff)
Rows 4-5: Ch 2, Puff around, ss to beginning ch (18 Puff) (2 rows)
Row 6: Ch 2, (Puff dec, Puff 1) x 6, ss to beginning ch (12 Puff)
Row 7: Ch 2, (Puff dec) x 6, ss to beginning ch (6 Puff)
FO, leave an extra long tail to create pumpkin segments. Tail should be around 5 feet (you may find this too long, but its better to have too long of a tail than one thats too short)
Stuff pumpkin (not too full since there are holes created by the Puff Stitch).
Using the long tail you left and a tapestry needle, weave through the front loops of the stitches made during the last row and pull tight to close off the hole. Take your needle back through the hole you just closed up and pull tight until the sphere is indented. Now you are going to wrap this tail around the outside of the pumpkin and back through the same hole you started with (first segment made). Repeat around until you have your desired number of segments, I repeated three times to get 4 segments. Tie a knot and fasten off your tail, hide tail inside of the pumpkin. Using glue, insert your stick into the center of the pumpkin you just made and hold for a few seconds until your glue dries. Once dry, you can add extra decorations to spruce up your pumpkin.
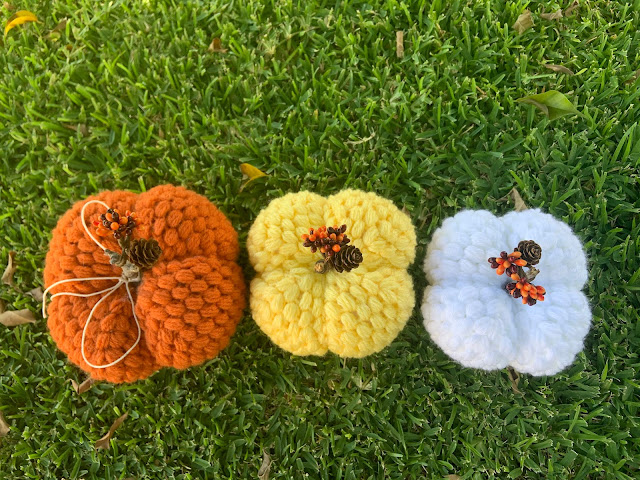
And Voila! Mini Pumpkin.
Want a more basic pumpkin? Click HERE for another free pumpkin pattern here on the blog!
Hope you enjoy this mini pumpkin and have a very happy spooky season!
-Lizzy
If you like this free pattern, consider buying me a coffee?
Tester Photos


Comments
Post a Comment